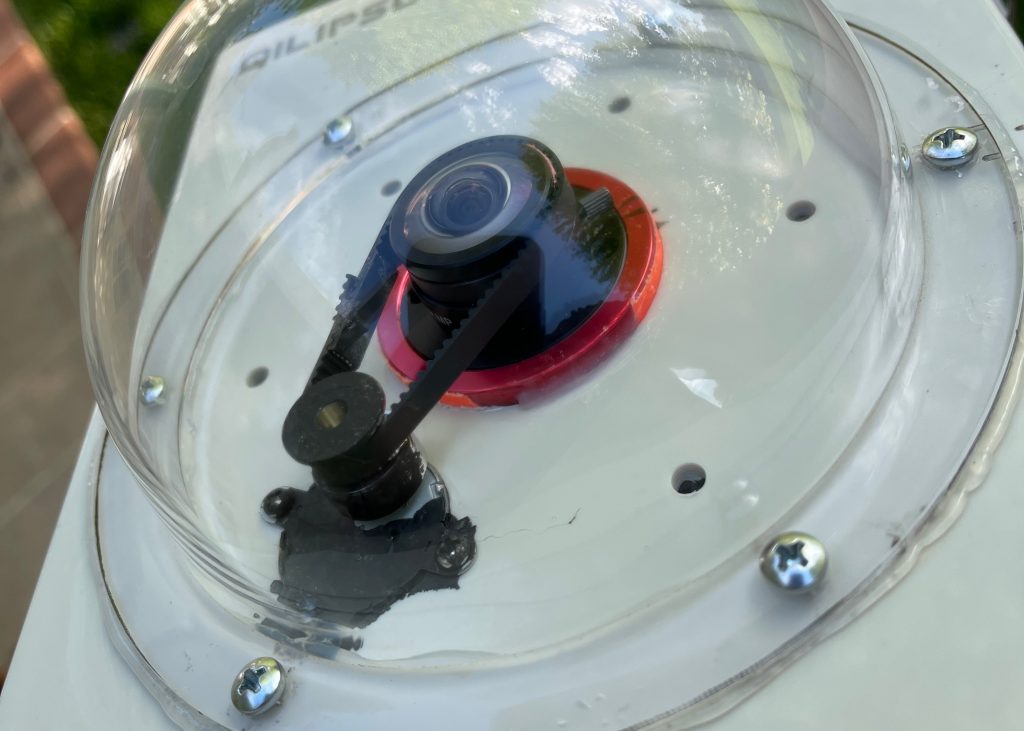
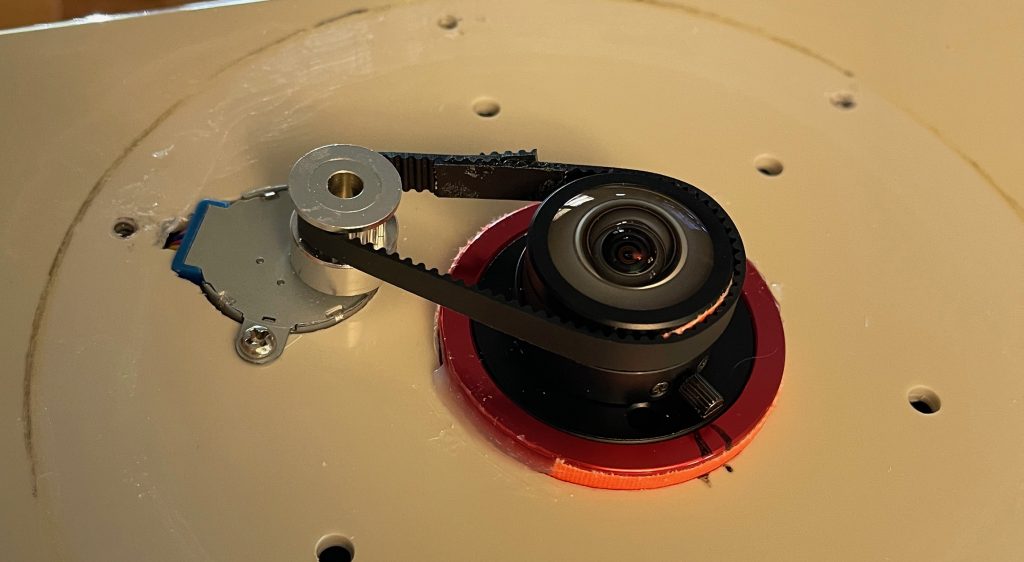
This little project was undertaken out of frustration of having to remove the dome & re-seal it in order to focus; that and curiosity. Lucky for me I had ordered a Raspberry PI starter kit from Amazon a few months earlier.
My setup/parts:
* Raspberry Pi 4, 8gb (any Pi with GPIO pins should work)
* Freenove Ultimate Starter Kit (amazon link)
* GT2 Timing Belt kit (amazon link)
* Random GPIO wires as needed
* Camera – Any ZWO ASI camera, 178MC is my camera of choice.
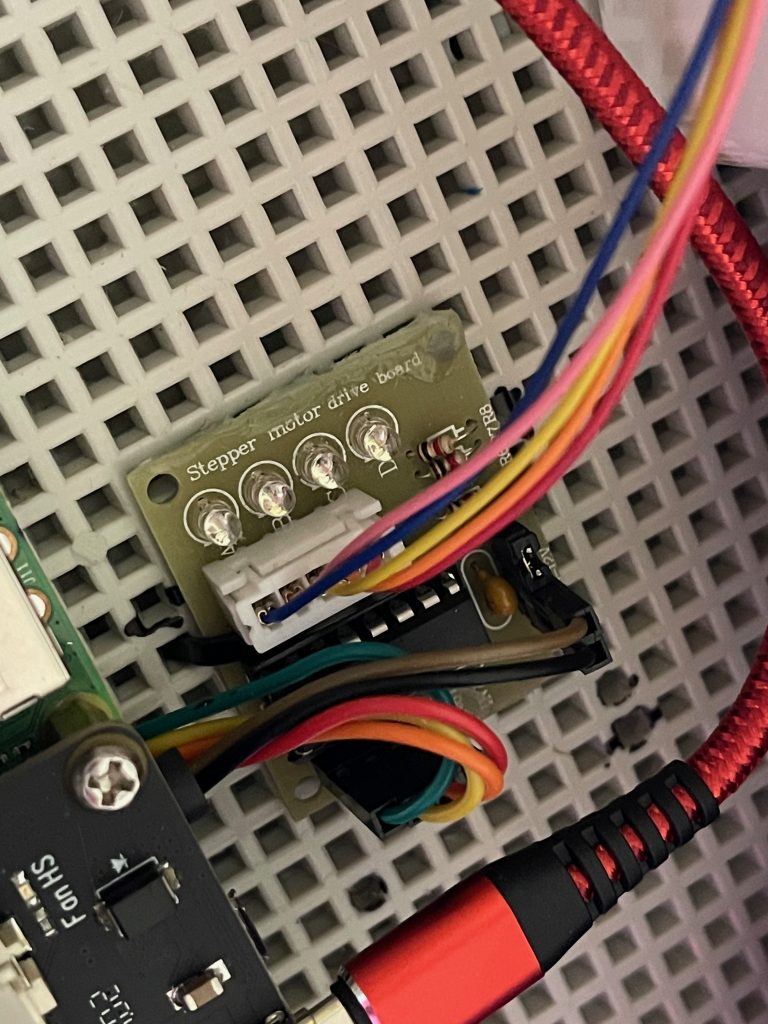
The Freenove kit came with a stepper motor & a controller board, as well as a PDF with tutorials/scripts for each of the included pieces & parts. I ran the base script a few times to figure out what the code was doing, then started playing with it – basically it came down to figuring out how many steps provided a small enough movement while not having to re-run the script 200x to get it right. I manually rotated the lens to get a rough focus first, then put on the timing belt, it made it easier to find good focus quicker. Below is the code that’s working decently on my system (formatting may be a little off due to WordPress):
 #!/usr/bin/env python3
 #
 #Filename    : SteppingMotor.py
 #Description : Drive SteppingMotor
 #Author      : www.freenove.com
 #modification: 2019/12/27
 #
 import RPi.GPIO as GPIO
 import time
 motorPins = (12, 16, 18, 22)    # define pins connected to four phase ABCD of stepper motor
 CCWStep = (0x01,0x02,0x04,0x08) # define power supply order for rotating anticlockwise
 CWStep = (0x08,0x04,0x02,0x01)  # define power supply order for rotating clockwise
 def setup():
     GPIO.setmode(GPIO.BOARD)       # use PHYSICAL GPIO Numbering
     for pin in motorPins:
         GPIO.setup(pin,GPIO.OUT)
 #as for four phase stepping motor, four steps is a cycle. the function is used to drive the stepping motor clockwise or anticlockwise to take four steps
 def moveOnePeriod(direction,ms):
     for j in range(0,4,1):      # cycle for power supply order
         for i in range(0,4,1):  # assign to each pin
             if (direction == 1):# power supply order clockwise
                 GPIO.output(motorPins[i],((CCWStep[j] == 1<<i) and GPIO.HIGH or GPIO.LOW))
             else :              # power supply order anticlockwise
                 GPIO.output(motorPins[i],((CWStep[j] == 1<<i) and GPIO.HIGH or GPIO.LOW))
         if(ms<3):       # the delay can not be less than 3ms, otherwise it will exceed speed limit of the motor
             ms = 3
         time.sleep(ms*0.001)     # SPEED OF THE ROTATION
 #continuous rotation function, the parameter steps specifies the rotation cycles, every four steps is a cycle
 def moveSteps(direction, ms, steps):
     for i in range(steps):
         moveOnePeriod(direction, ms)
 #function used to stop motor
 def motorStop():
     for i in range(0,4,1):
         GPIO.output(motorPins[i],GPIO.LOW)
 def loop():
     print("Moving 32 steps cw, 22.5 degrees.")
     moveSteps(0,3,32)  # rotating 32 steps in a circle - (direction, ms, steps)
     #print("Moving 64 steps cw, 45 degrees.")
     #moveSteps(0,3,64)  # rotating 64 steps
     #time.sleep(0.5)
     # moveSteps(1,3,128)  # rotating 128 steps in a circle
     # time.sleep(1.5)
     # moveSteps(1,3,256)  # rotating 256 steps in a circle
     # time.sleep(5.5)
     #moveSteps(1,3,512)  # rotating 512 steps in a circle
     #time.sleep(1.5)
     #moveSteps(0,3,512)  # rotating 360 steps
     #time.sleep(1.5)
 def destroy():
     GPIO.cleanup()             # Release resource
 setup()
 loop()
 destroy()
I’m not the best at explaining exactly HOW the code works, but if I was able to stumble through it, I’m sure someone else can with a little bit of tinkering. I’d suggest before installing everything, connect the motor to the controller board, and the controller to the GPIO pins – then stick a piece of tape on the rotating post so it makes a sort of a flag. It’ll give you a decent visual idea of how much your coded steps is making it. I left the commented code in place to show examples of the different steps/rotation codes.
Last but not least, find some FLAT Black paint and paint over the face of the motor to prevent reflection artifacts on the dome in your images.